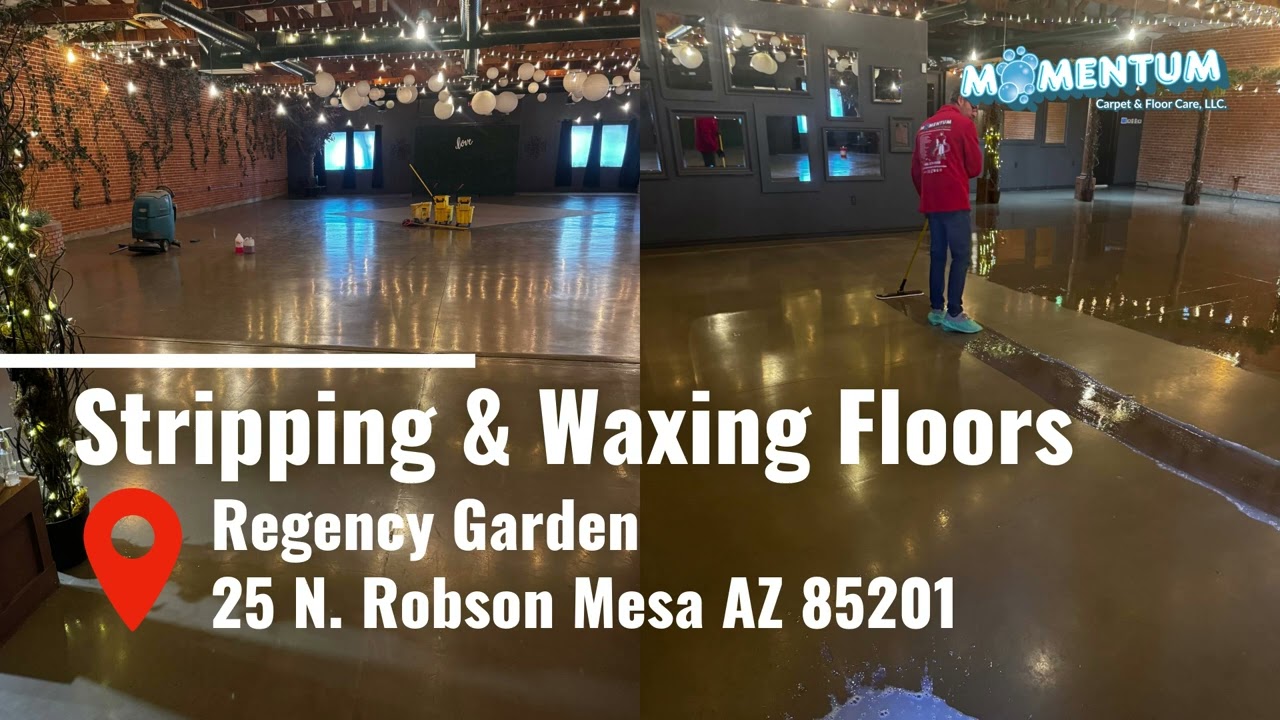
Stripping Waxing Floors: Regency Garden, 25 N. Robson Mesa AZ 85201
Section Title
Customer
Regency Garden is a premier venue for outdoor weddings and events, featuring beautiful gardens and climate-controlled facilities. Our mission is to create amazing experiences with exceptional service, offering a perfect setting for both intimate gatherings and grand celebrations. Celebrate love surrounded by nature’s beauty at Regency Garden.
Cleaning Service
- Stripping and Waxing Floors
Benefits of Cleaning Service
Momentum Carpet & Floor Care, LLC: Step-by-Step Guide for Stripping and Waxing Floors Step 1: Area Preparation: Start by removing all furniture and obstacles from the area. Utilize caution signage to ensure everyone's safety and establish a clear exit route. Lay down mats to minimize contamination and dust mop the floor to eliminate debris. Step 2: Stripping Supply Setup: Prepare a bucket lined with plastic to hold your floor stripper. Familiarize yourself with the Safety Data Sheets and mix the stripping solution as per the product guidelines. Ensure you wear the appropriate protective equipment. Step 3: Application of Stripping Solution: Apply the stripping solution generously across the surface and allow it to sit for around 10 minutes. Utilize a floor buffer or auto scrubber to effectively remove the old finish, making sure to recover the solution efficiently. Step 4: Recovery of Soiled Solution: After scrubbing, use the auto scrubber or a wet recovery vacuum combined with a buffer to thoroughly collect the used solution. Prompt recovery is essential to prevent it from drying out. Step 5: Floor Rinsing and Drying: Rinse the floor with clean water mixed with a neutralizing agent to counteract the stripper, ensuring the pH level is suitable for applying a new finish. Don’t forget to clean the baseboards and perform multiple rinses if necessary. Step 6: Sealer Application: Once the stripping process is complete, apply a floor sealer to safeguard the surface against wax absorption. It's advisable to use two compatible coats for preserving the quality of tile and laminate, providing a smooth base for wax application. Step 7: Waxing the Floor: Proceed by applying a floor wax that corresponds with your flooring type. For increased durability, apply between four to ten layers, adding extra coats in high-traffic areas for better resilience. Step 8: Finish Layer Application: Optionally, consider adding a finishing layer over the wax to provide enhanced protection against scratches and dirt buildup, which will extend the longevity of the wax. Step 9: Buffing the Floors: Conclude by buffing the newly waxed floors to eliminate any dust and amplify shine. Regular buffing is recommended—monthly for lower traffic zones and weekly for busier areas—to maintain the floor’s appearance.
Zip Code
Address
Google Map
Real Estate Listing
https://www.loopnet.com/property/25-n-robson-mesa-az-85201/04013-13835009A
Map
Video